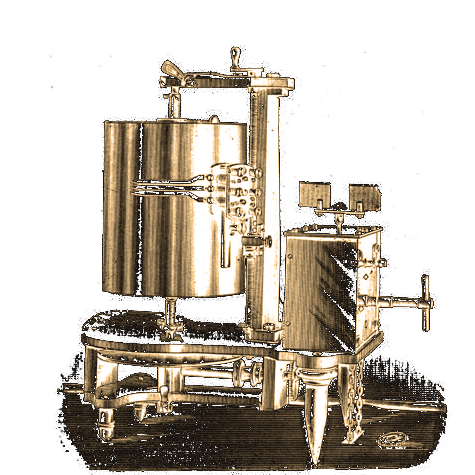

An interactive demonstration of the Müller-Lyer illusion
13 August 2026
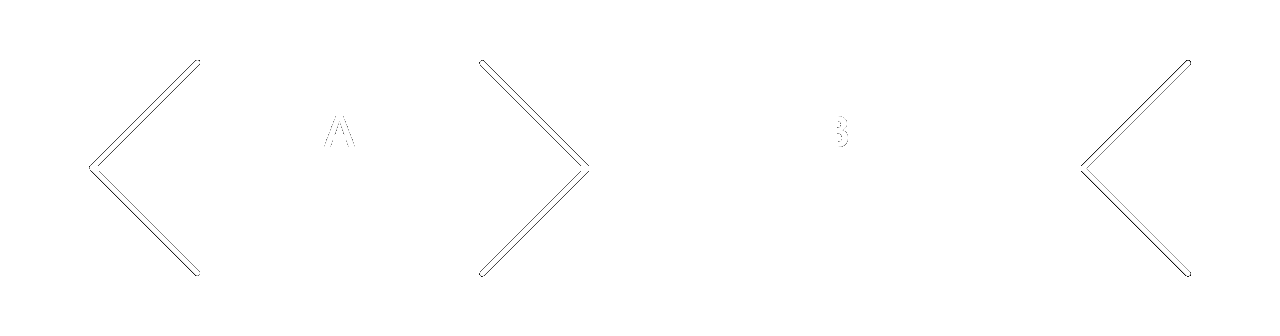
The Müller-Lyer illusion (see Figure 1) is one of the most popular optical-geometrical illusions. In this illusion, one of the line segments (line B) appears to be longer than another (line A), despite both having exactly the same length. The perception of line length, which is usually accurate, is here affected by the small oblique lines (context) that mark the ends of the line segments – the latter appear more or less elongated depending on whether they are enclosed by convex or concave elements, respectively. Like other optical-geometrical illusions, this one also demonstrates that perception operates contextually, with properties of distal objects being estimated relative to the context in which they are embedded.
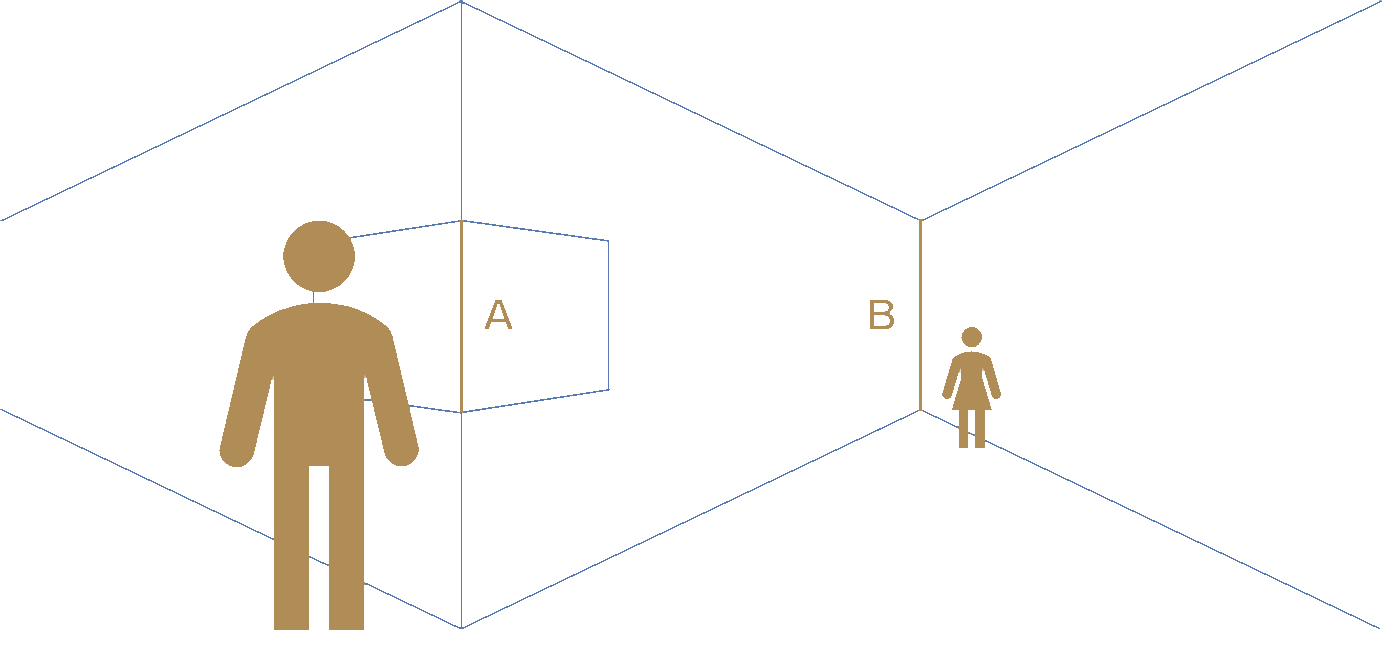
Despite having been extensively studied, there is still no entirely consensual theoretical explanation for this illusion, despite the popularity of Richard Gregory’s (1997) proposal. According to this author, the Müller-Lyer illusion may be due to the fact that, in the three-dimensional world and as a result of the laws of perspective, concave/convex angles are more prevalent in rectilinear objects that are closer to/further from the observer. This natural statistic is particularly evident in (Western) architectural structures and is illustrated in Figure 2 – in it, the two vertical lines marked A and B are the same length in the drawing itself, but correspond to heights that, in the three-dimensional world implied by perspective, would necessarily be different (with B being taller than A).
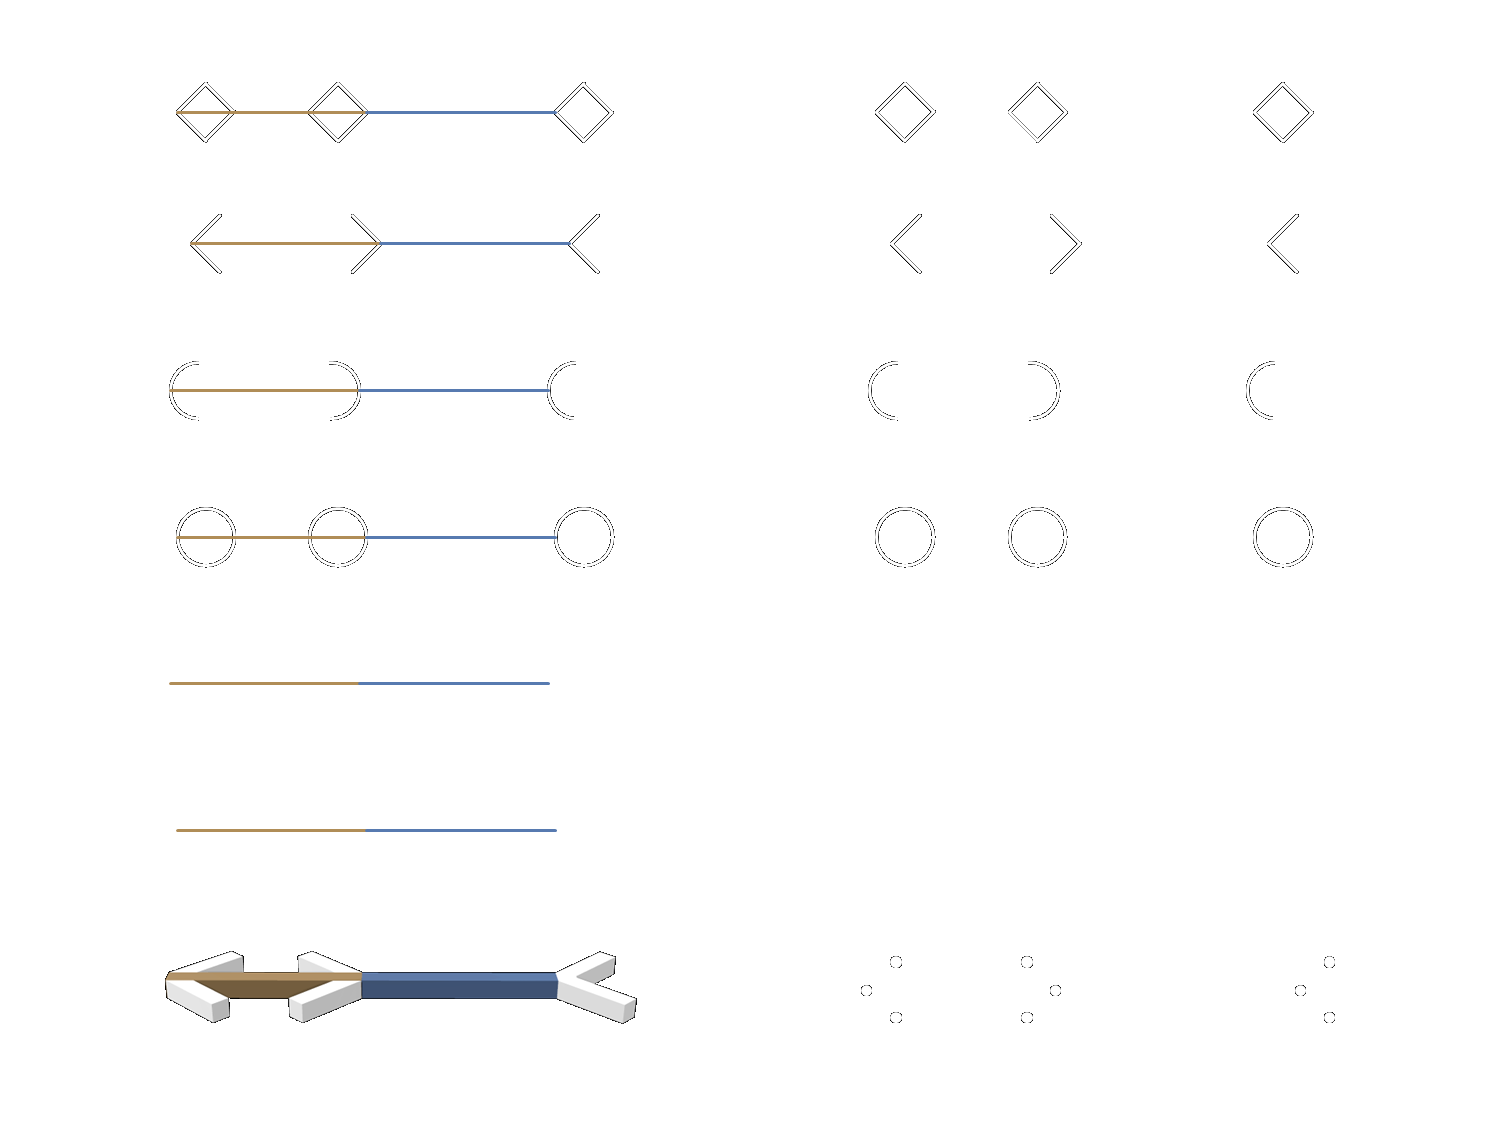
Although some more recent evidence tends to support Gregory’s explanation in essence (see, for example, Howe & Purves, 2005), it is worth noting that it is less convincing for other, less well-known versions of the Müller-Lyer illusion, such as those shown in Figure 3 (for details, see Robinson, 1972). It can be seen that the illusion occurs with other concave/convex contexts besides oblique lines (e.g. circles and squares), occurs even for the perception of the length of empty spaces or with point configurations alone, and persists even when the elements are explicitly represented in perspective, presumably obviating the need for inferences about their three-dimensional configuration.
Be that as it may, and regardless of the explanations for the phenomenon, the Müller-Lyer illusion undoubtedly has a role to play in teaching about perception, whether to illustrate its contextual nature, as an example of the relationship between perceived distance and size, or even as a stimulus for teaching psychophysical methods. In this respect, it may be pedagogically useful to have an interactive demonstration of the illusion that can be actively explored, which would not be possible if it were merely shown on a lecture slide.
The photographs in Figure 4 show one possible interactive demonstration of the Müller-Lyer illusion, implementing the Method of Adjustment, which can be used in any lecture, as part of a practical exercise, or simply as a physical demonstration of this famous illusion.
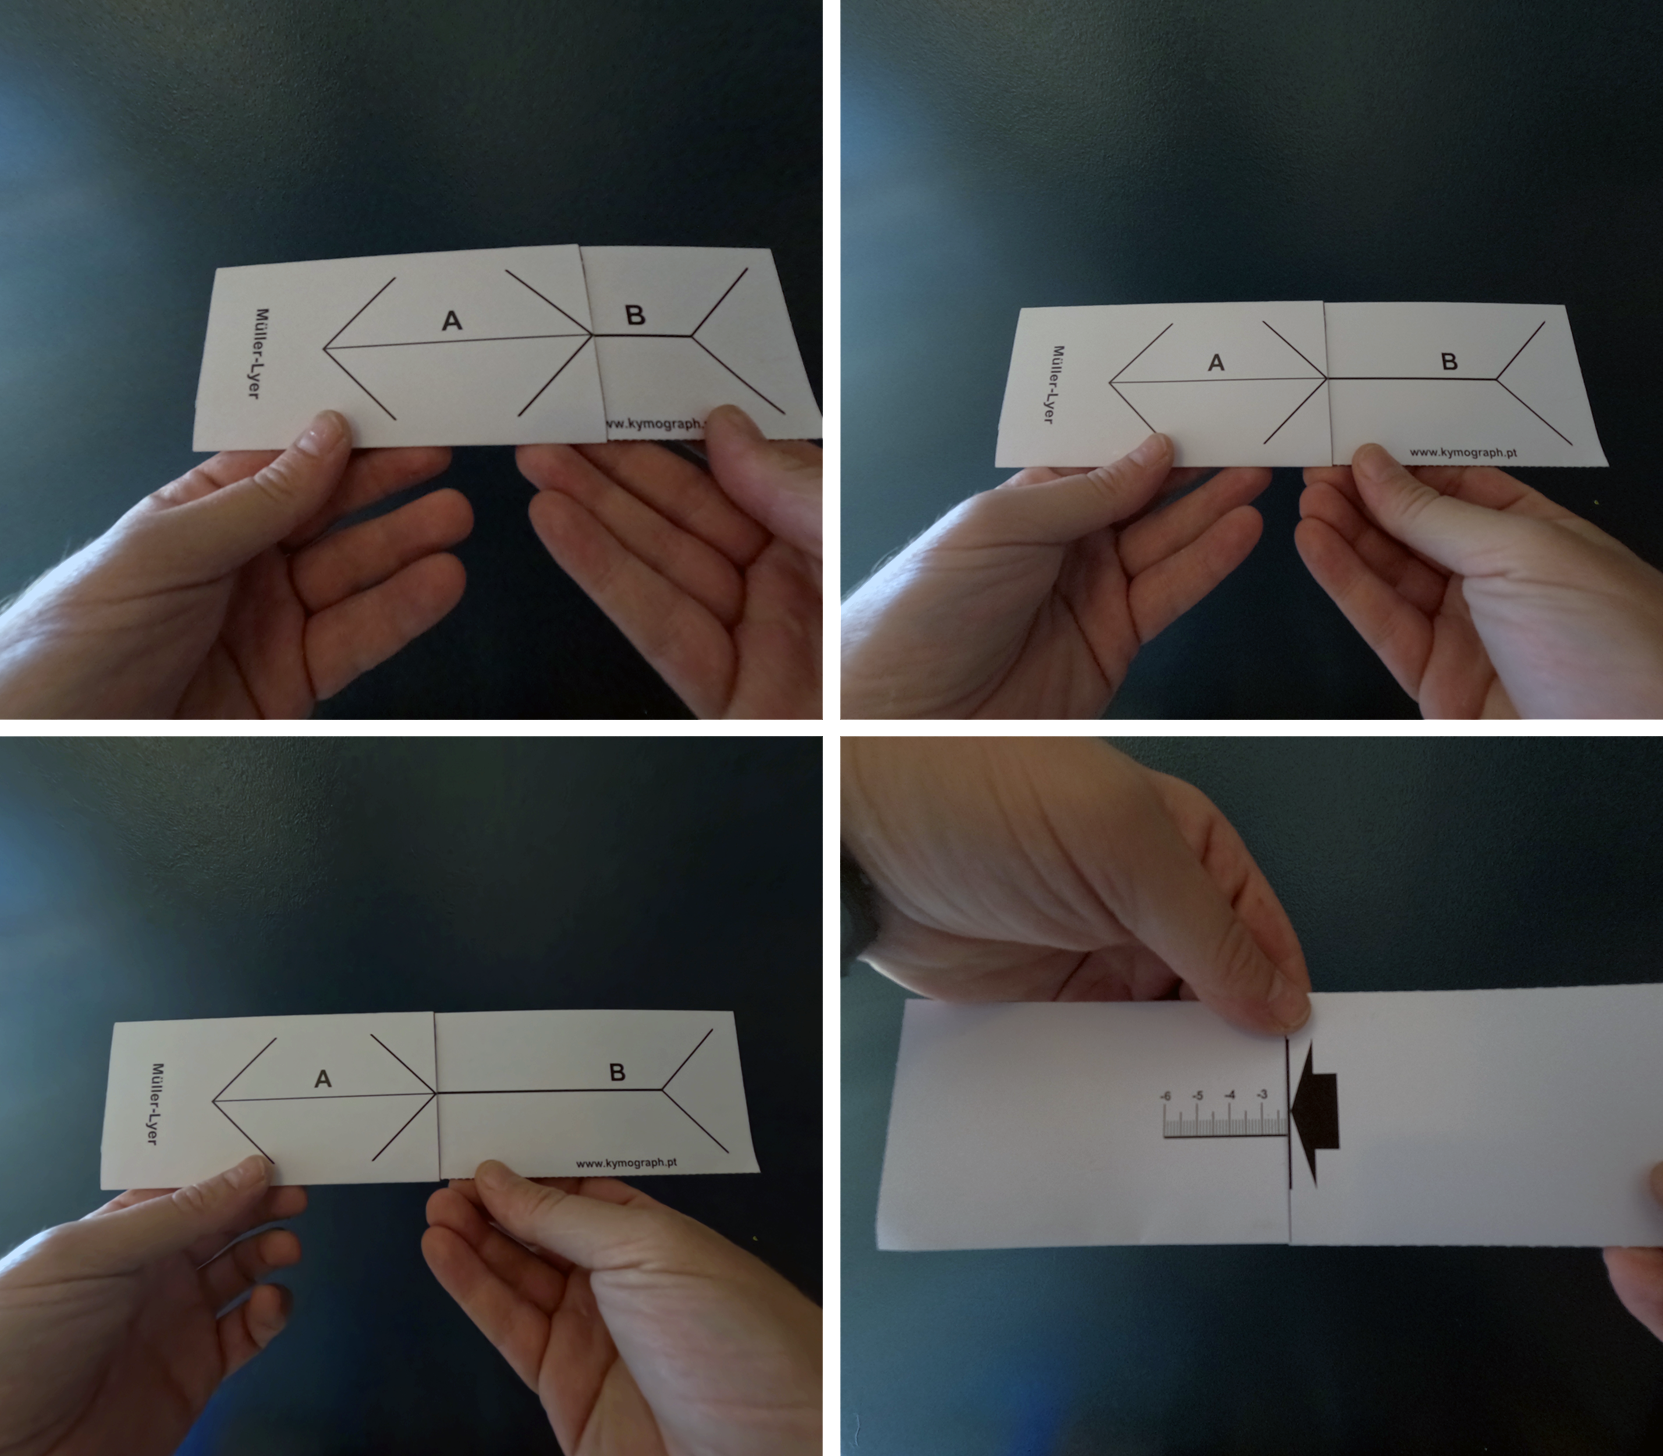
To construct this demonstration, simply download and print the following file (PDF format; print each page on a separate sheet):
Download PDFThe demonstration will be sturdier and more effective if printed on slightly thicker paper (but not too thick; e.g. card). Once printed, cut along the solid lines and fold along the dashed lines. The element on the first page, containing line segment B, should be glued onto itself; the one on the second sheet, containing line segment A, should be glued in the area marked with a drawing of a glue stick, so as to leave an opening into which the element containing segment B can be inserted.
The length of segment B can now be adjusted to perceptually match the length of segment A by pushing it further in or pulling it further out – on the back, there is a small printed scale indicating the error in centimetres: negative/positive numbers indicate that segment B has been adjusted to a length shorter/longer than segment A. For a better estimate of the magnitude of the illusion, the errors from several adjustments can be averaged (in my case, the mean error is around -2.3 cm, indicating that segment B would have to be 2.3 cm shorter for it to appear equal in length to segment A). The instructions can also be varied to test the effect of 'response attitudes' – e.g. adjust the length of segment B so that it appears, holistically, to be as long as segment A or adjust the length of segment B so that it is equal to segment A, ignoring the small oblique lines and focusing only on the segments themselves (cf. Bates, 1923; Gardner & Long, 1961; Predebon, 2004).
To reproduce the conventional version of the illusion, simply adjust the length of segment B so that the scale on the back reads 0 – at this value, the two segments (A and B) have exactly the same length.
Bibliography
-
Bates, M. (1923). A Study of the Müller-Lyer Illusion, with Special Reference to Paradoxical Movement and the Effect of Attitude. The American Journal of Psychology, 34(1), 46–72.
-
Gardner, R. W., & Long, R. I. (1961). Selective attention and the Mueller-Lyer illusion. The Psychological Record, 11, 317–320.
-
Gregory, R. L. (1997). Eye and Brain: The Psychology of Seeing (5th Ed.). Princeton University Press.
-
Howe, C. Q., & Purves, D. (2005). The Müller-Lyer illusion explained by the statistics of image-source relationships. Proceedings of the National Academy of Sciences of the United States of America, 102(4), 1234–1239.
-
Predebon, J. (2004). Selective attention and asymmetry in the Müller-Lyer illusion. Psychonomic Bulletin & Review, 11, 916–920.
-
Robinson, J. O. (1972). The Psychology of Visual Illusion. Hutchinson & Co.